Working with dates is an essential skill for any Excel user. Being able to convert between different types of date units, such as days to years, is incredibly valuable. For example, you may need to figure out how old someone is or how many years have passed since an event. Aggregating data to a year level can be beneficial for summary reporting. In this tutorial, you’ll learn how to convert days to months in Excel.
By the end of this tutorial, you’ll have learned the following:
- How to use the DATEDIF() function to calculate the number of whole years between two dates in Excel
- How to use the YEARFRAC() function to calculate the number of precise years between two dates in Excel
Understanding How Years are Counted
Years can be a tricky thing to count. Not because it’s inherently complicated, but because there are different standards in terms of what makes up a year. While this topic may seem a little pedantic, understanding some of the different conventions will give you a better sense of how to work with some of the functions you’ll learn throughout this tutorial.
When speaking about whole years, you can often simply check if an entire year has passed. For example, someone is considered to be 19 when they’ve had 19 birthdays.
In other cases, a year may be considered to be made up of 12 months made up 30 days each. This is actually the convention that Excel uses in some of its formulas, such as YEARFRAC(). It’s important to understand this, as it may lead to some unexpected results. Similarly, if you want to be more precise, you can calculate a year as being 365 days, though this may not account for leap years.
Now that we’ve covered this, let’s dive into how to calculate the number of whole years between dates in Excel.
How to Calculate the Number of Whole Years Between Two Dates in Excel
How can you calculate the number of whole years between two dates in Excel?
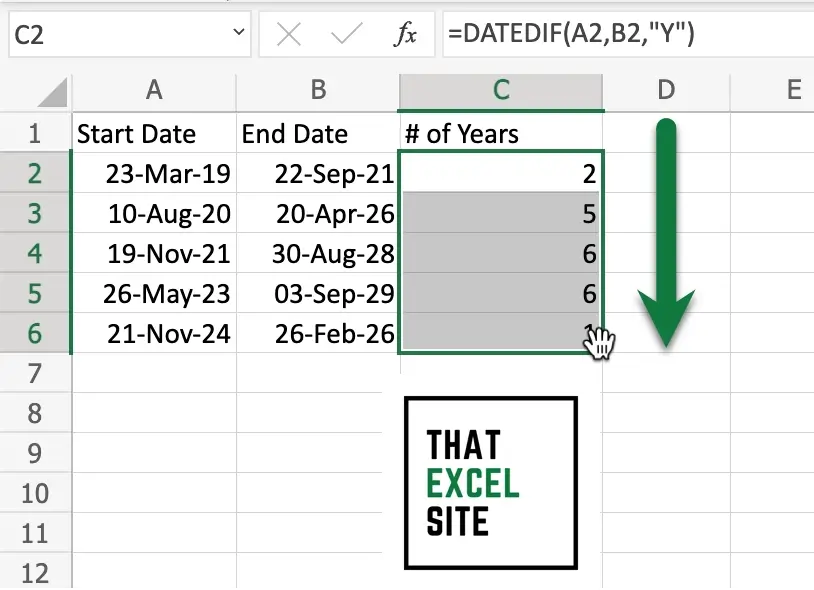
To calculate the number of years between two dates in Excel, use the DATEDIF() function, passing in the start date, end date, and “Y”. This returns the number of whole years between the two dates.
Now that you have a good understanding of how to calculate the number of years, let’s walk through a step-by-step example of how this can be done.
How to Calculate the Number of Whole Years Between Two Dates in Excel
Load your dataset in Excel
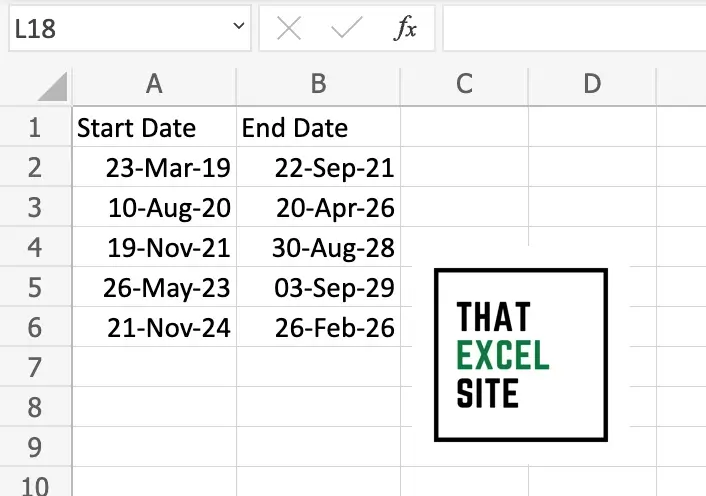
In the dataset that we’re using, we have two columns of dates. The first contains the start date and the second contains the end date. We’ll use a third column to calculate the number of whole years that have passed between the two dates.
Use the DATEDIF() function to calculate the number of years
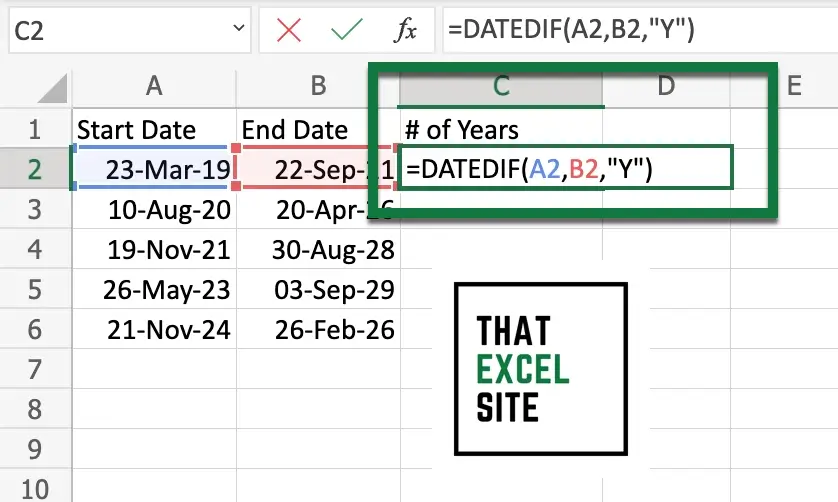
By using the DATEDIF() function in Excel, you can pass in the start date, end date, and the unit you want to calculate. In this case, we pass in "Y" to calculate the number of whole years.
Hit Enter to complete your function
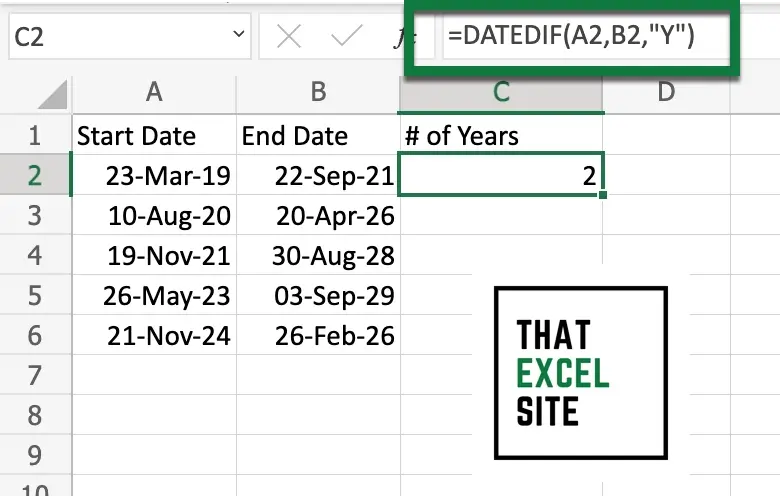
When you hit the Enter key, Excel completes the function. This returns the number of whole years, ignoring any fractional years.
Use the fill handle to complete the function for all cells

By clicking and dragging the fill handle down to the end of the dataset, Excel copies the formula for all cells in the range. This will adjust the relative references, returning the number of whole years between the two sets of dates.
This can be a helpful method to check if someone is at least a certain age. In some cases, however, you’ll want to know more precisely how many years have passed between two dates. This is what you’ll learn in the following section.
How to Calculate the Number of Precise Years Between Two Dates in Excel
In this section, you’ll learn how to calculate the number of years that exist between two dates, precisely. Remember our earlier discussion about how years are calculated and how they can vary. This will become important as we walk through this section.
Let’s walk through a step-by-step example of how to calculate the number of years between two dates in Excel. We’ll use the same dataset and explore the YEARFRAC() function in Excel.
Step 1: Load Your Dataset

In this example, we’re using the same values as we did in our previous example. We have a column containing start dates and end dates. We want to calculate the number of months between the two dates.
Step 2: Use the YEARFRAC() Function to Calculate the Number of Years
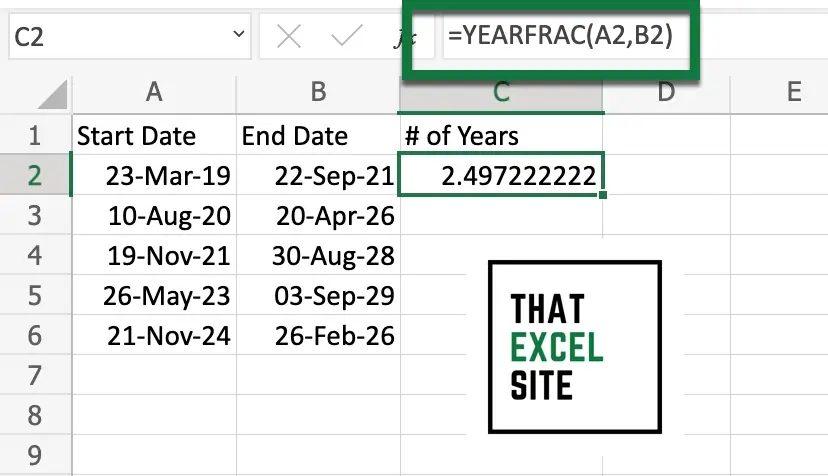
In the example above, we passed in the start date and the end date. By default, Excel will use a value of 0 for the basis argument. This changes how a date is calculated.
By default, Excel will calculate a year to be based on 12 months with 30 days each. This means that a year is considered to have 360 days. However, the function provides a number of different options to customize this behavior:
basis=0is the default and will assume 360 daysbasis=1will use actual years, meaning that it includes leap yearsbasis=2will assume a year to be 365 days
Step 3: Drag the Fill Handle Down to Calculate the Number of Years For All Values
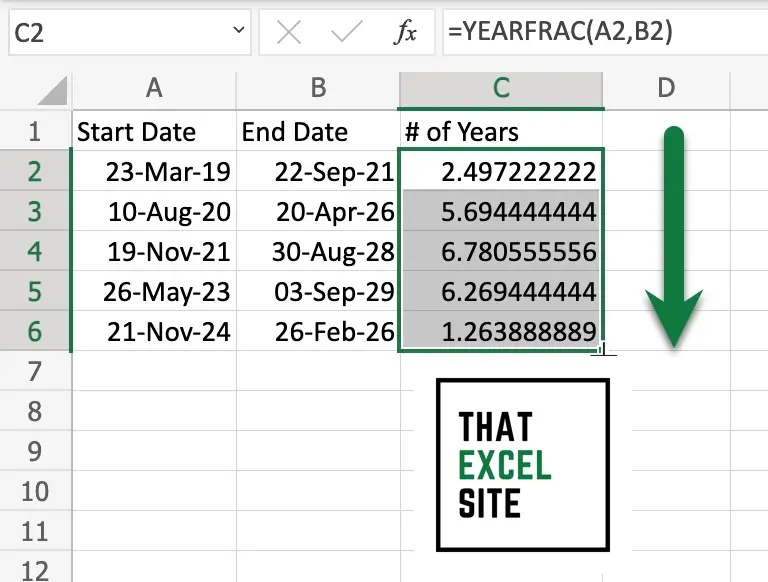
By clicking and dragging the fill handle, you’re able to copy and paste the formula for all values. This will automatically calculate the values for each of the sets of dates, returning the number of years between the dates.
Conclusion
In this tutorial, you learned how to calculate the number of dates between two dates. Understanding how to do this allows you to calculate helpful values, such as whether a person is of a certain minimum age. You first learned how years are calculated and how this can lead to some unexpected results.
Then, you dove into a practical example. You learned how to use the Excel DATEDIF() function to calculate the number of entire years between two dates. From there, you learned how to use the Excel YEARFRAC() function to calculate the number of precise, fractional years between two dates in Excel. You also learned how to use the function’s arguments to customize how years are represented in Excel.
Additional Resources
To learn more about related topics, check out the tutorials below:

