Being able to work with dates is an essential skill for anyone working in Excel. This is true, regardless of industry. In this tutorial, you’ll learn how to get the year from a date in Excel. Being able to extract the year from a date in Excel allows you to categorize data to a particular year. It opens up additional doors in comparing whether a year occurred before or after a given year.
By the end of this tutorial, you’ll have learned the following:
- How to get the day of the year from a date in Excel, either as a number or as text
- How to display the year in Excel but maintain date information
What Method is the Best for Getting the Year from a Date in Excel?
In this tutorial, you’ll learn three different methods for getting the year from a date in Excel, including:
- Using the YEAR() function to get the weekday as a number
- Using Excel formatting to display a year for a given date, while retaining date information
- Using the TEXT() function to show the year for a given date
Each of the methods provides a specific benefit over the other methods. Take a look at the table below, which breaks down the benefits of each of the three different methods:
| Method | Best For… |
|---|---|
| YEAR() | Getting the year as a number |
| Excel Formatting | Keeping date information but only changing how the date is displayed |
| TEXT() | Getting the year as a text value, which is helpful when you want to concatenate |
Now you’re probably thinking, “Great – but how do I do any of this?!” Don’t worry, we’re diving into that right now!
How to Get the Year from a Date in Excel Using YEAR()
How can you get the year from a date in Excel?
To extract a year from a date in Excel, you can simply pass the date into the YEAR() function. The function accepts a date as its only input and returns a whole number, containing the year.
Extracting the year from a date as a number can be really helpful when identifying whether or not a year is before or after a given year. For example, you may want to check if something happened during the year 2020.
Let’s walk through a step-by-step example of how to get the year in Excel.
Step 1: Load Your Dataset in Excel
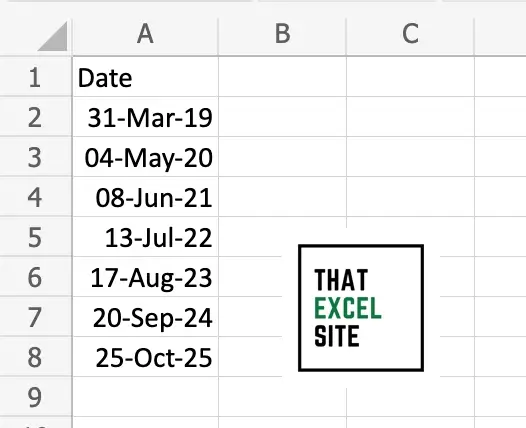
In this example, we’ll use a dataset that contains seven different dates. Each of these dates come from different years.
Step 2: Use the YEAR() Function to Get the Year
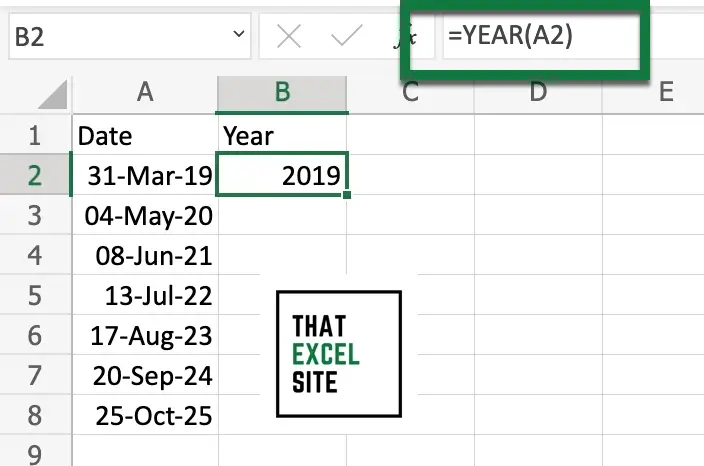
By passing a date into the YEAR() function, Excel will return a number containing only the year.
Step 3: Use the Fill Handle to Copy the Formula Down
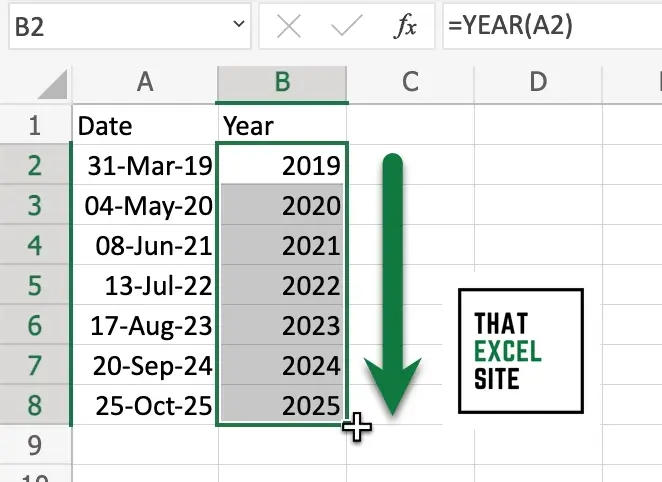
By clicking and dragging the fill handle, you can easily copy and paste the formula for multiple cells. When you drag the formula down for the entire range of values, Excel will extract the year from each of the cells in the dataset.
In the following section, you’ll learn how to use the Excel formatting to display the year for a date without losing the details of the date.
How to Use Excel Formatting to Display a Year for a Date
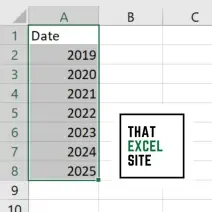
In the previous section, we used Excel to return the year as a number. In this case, the detail of the date isn’t carried forward, meaning that we lose the detail of the date.
In some cases, however, you’ll want to simply display the year, rather than overwriting the details of the date itself. In these cases, you can make use of the formatting options available in Excel.
To see how this works, let’s walk through a step-by-step example.
Step 1: Load Your Dataset in Excel
In this example, we’ll use a dataset that contains seven different dates. Each of these dates come from different years.
Step 2: Select the Formatting Option Menu
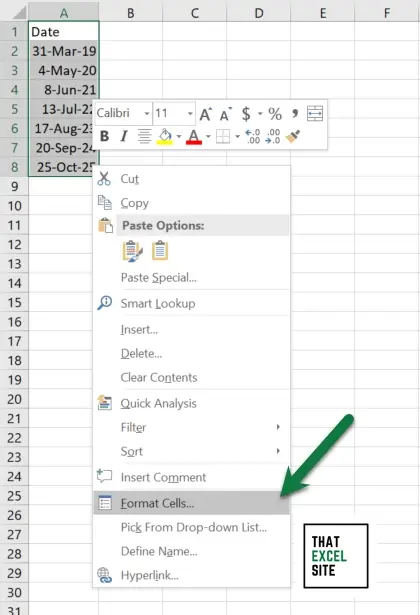
With the cells selected, click on the dropdown on the Number formatting options. This will open up the Format Cells window.
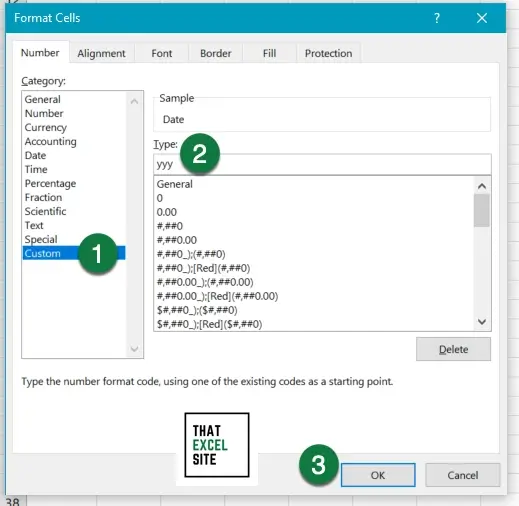
Step 3: Select Custom and Click OK
Select the Custom category and type yyy into the Type field. This will format the date as a full year. If you want to use a short form (2 digit year), instead, you can also pass in yy. Select OK and Excel will apply the formatting to the cells.
How to Convert a Date to a Year in Excel Using TEXT()
You may be wondering why this part is even included. Part of the usefulness of years is that they’re numbers – so, why would we want to convert them to text? This can be quite useful when you want to combine text with the year, without needing to convert the year number subsequently.
In order to convert a date to a year in Excel, use this formula: =TEXT(A2, “YYYY”). Alternatively, you could just use “YYY”, which returns a four digit year. Using “YY” will return an abbreviated year, using only two values.
Let’s take a look at how this works in Excel, by working through a step by step example.
Step 1: Load Your Dataset in Excel
In this example, we’ll use a dataset that contains seven different dates. Each of these dates come from different years.
Step 2: Use the TEXT() Function to Get the Year
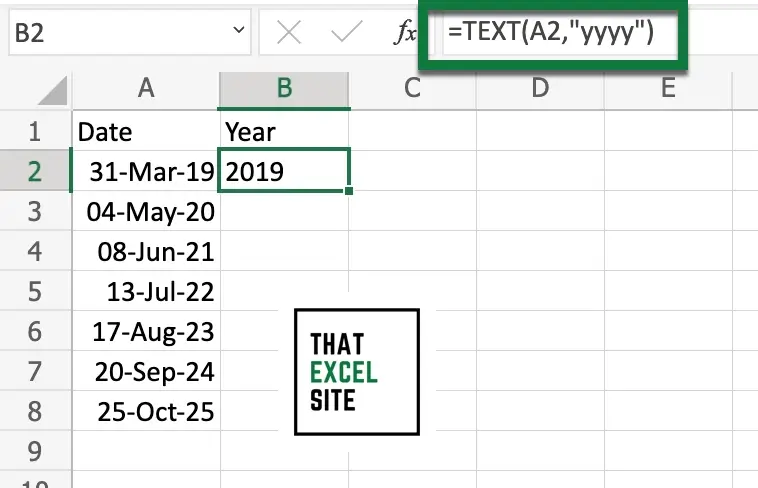
By passing in a date value into the Excel TEXT() function, we can customize how the date should be represented. For example, by passing in "yyy", as we did above, the formula returns the year of the date. For example, the date January 23, 2023 would show 2023.
Do you want to show a two-digit year instead?
If you want to show a two-digit year instead, you can pass in "yy" into the TEXT() function instead. This will load only the trailing two digits of the year. For example, the date January 23, 2023 would show only 23.
Step 3: Use the Fill Handle to Copy the Formula Down

By clicking and dragging the fill handle, you can easily copy and paste the formula for multiple cells. When you drag the formula down for the entire range of values, Excel will extract the year from each of the cells in the dataset.
Conclusion
In this tutorial, you learned how to get the year from a date in Excel. First, you learned how to get the year as a number. Then, you learned how to show the year using formatting, without losing the details of the date directly. Finally, you learned how to display the date as text, either as a two-digit year or the full year. The usefulness of this comes into play when wanting to combine the year with other text values.
Additional Resources
To learn more about related topics, check out the tutorials below: