
Being able to work with text in Excel is an incredibly valuable skill. Because text data is often messy, you’ll likely find yourself wanting to strip or remove the first or last characters from a cell in Excel. In this tutorial, you’ll learn how to use Excel to remove characters from both the left and the right of a string. You’ll learn how to do this for a single cell, as well as for an entire column of text data.
By the end of this tutorial, you’ll have learned:
- How to remove characters from the left of a string using the
RIGHT()andREPLACE()functions - How to remove characters from the right of a string using the
LEFT()function - Use Excel’s Flash Fill feature to remove unwanted leading or trailing characters
- How to use Excel’s Text to Columns feature to remove characters from the left of a string
How to Remove Characters from the Left of a String in Excel
Excel makes it easy to remove characters from the left of a string by providing two options:
- Using the
REPLACE()function, and - Using the
RIGHT()function
In this section, you’ll learn how to use both of these functions to strip characters using these two functions.
How to Use the REPLACE() Function to Remove Characters from the Left of a String
The Excel REPLACE() function is used to, well, replace a string or substring in Excel. Let’s take a look at what the REPLACE() function looks like before diving into how to use it:
REPLACE(old_text, start_num, num_chars, new_text)We can see that the Excel REPLACE() function provides four parameters:
old_text=represents the text from which you want to remove charactersstart_num=represents the starting position from where to remove characters. In our case, this will always be 1.num_chars=represents the number of characters you want to replacenew_text=represents the text to replace with
Let’s see how we can use the REPLACE() function to remove the first two characters of a string in Excel:
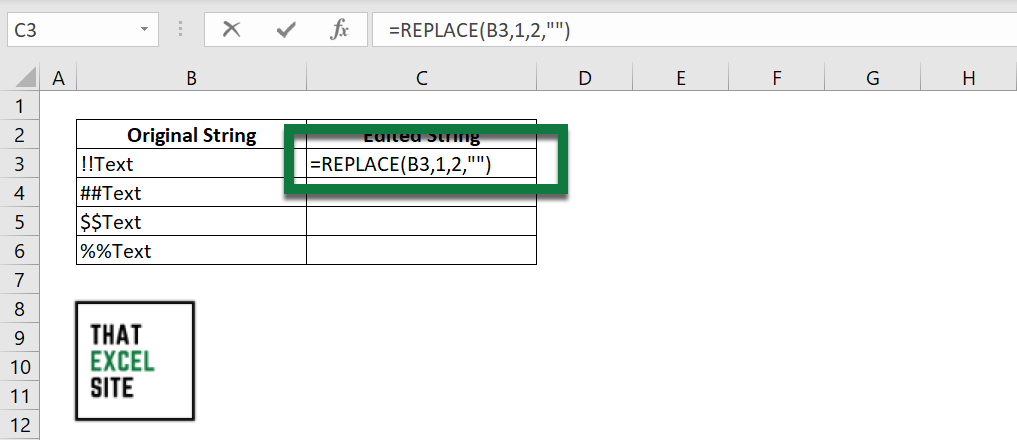
- Let’s load our workbook, which contains our original strings in column A
- In cell B2, let’s write the following formula:
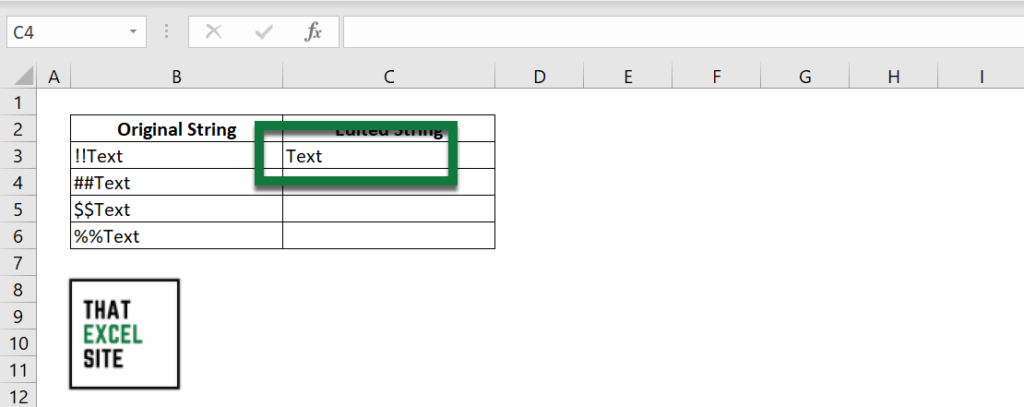
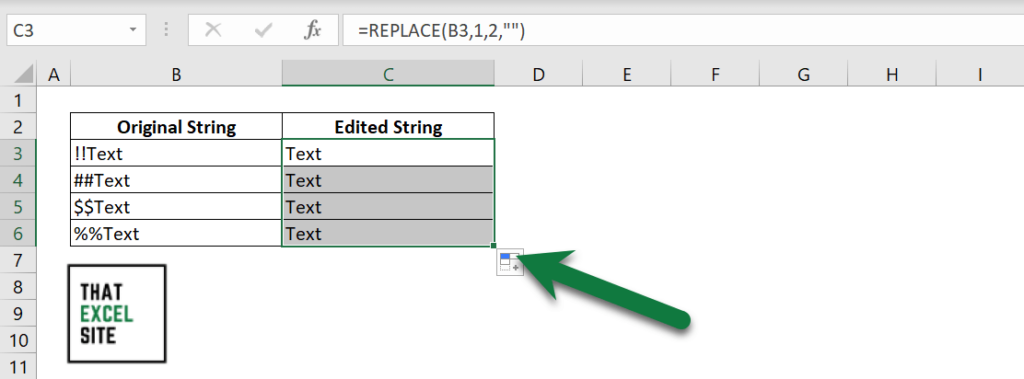
=REPLACE(B2, 1, 2, "")
- When you hit the Return key, the first two characters are removed
- To do this for every cell in the column, we can simply drag the fill handle down to the last value
Let’s break down how this works. We tell Excel that we want to replace 2 characters in cell A2, starting at position 1. This means that we’re replacing the first two characters. Instead of passing in a replacement string, we simply replace it with an empty string "".
How to Use the RIGHT() Function to Remove Characters from the Left of a String
The Excel RIGHT() function is used to extract characters from the right side of a string. While it may seem confusing the use a function named ‘right’ to remove characters from the left, we can make this make sense quite easily!
Let’s take a look at the RIGHT() function:
=RIGHT(text,[num_chars])We can see that the function has two parameters:
text=, the text to replace characters from, andnum_chars=, the number of characters to take from the right
At this point, we need to calculate how many characters we want to extract. This is where we’ll use the LEN() function.
Say we wanted to remove the first two characters from a string, we could extract all of the characters from the right except for the first. In order to do this, we can subtract 2 from the length of the string. Let’s see what this looks like:
=RIGHT(A2, LEN(A2) - 2)In doing this, we ask Excel to take all of the characters from the string except for the first and second ones on the left. Let’s see how we can do this to remove the first character from an entire column in Excel:
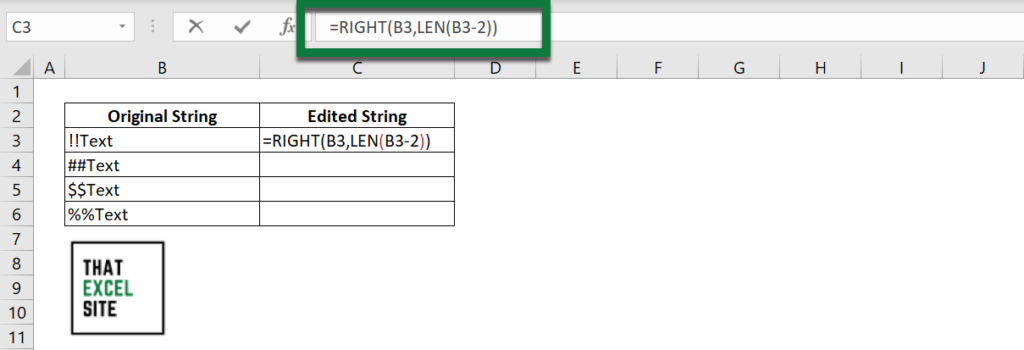
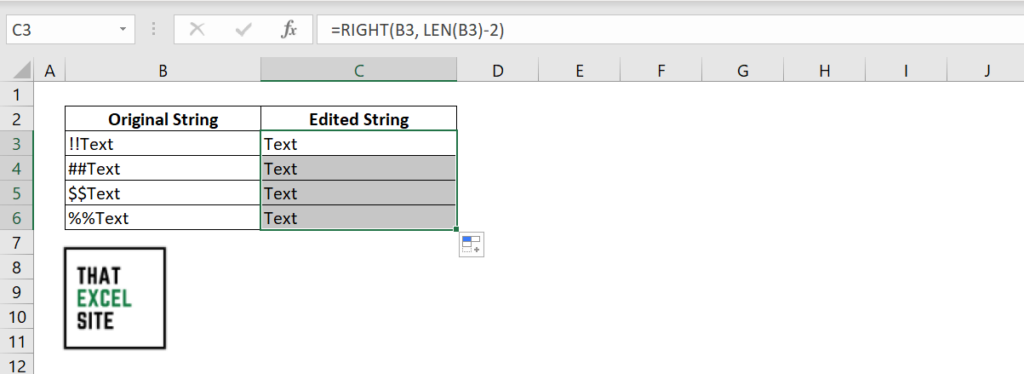
- We’ll load our Excel workbook, which contains the original strings in column B
- In cell C3, we’ll use the function
=RIGHT(B3, LEN(B3) - 2)
- Once we hit Return, we can see that the first character has been removed from the string
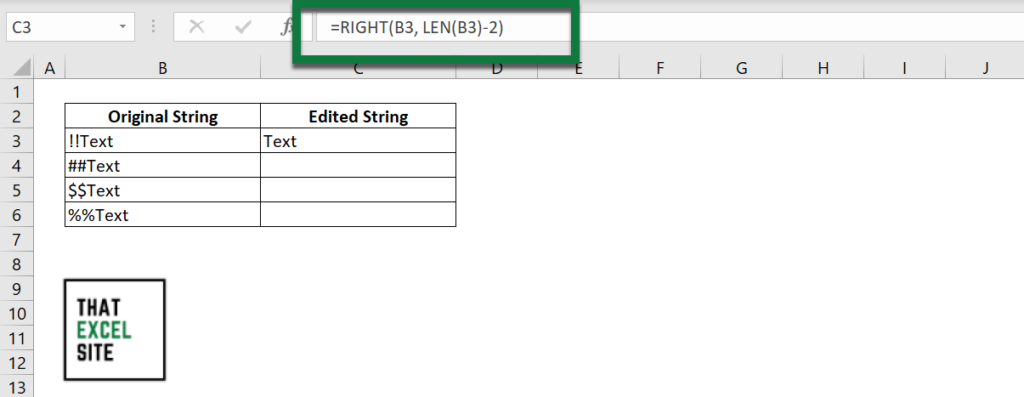
- To complete this for the full column, simply drag the fill handle all the way down
Now that we’ve covered removing strings from the left, let’s take a look at how to remove strings from the right of a string in Excel.
How to Remove Characters from the Right of a String in Excel
Removing characters from the right of a string in Excel can be done using the LEFT() function. Similar to using the RIGHT() function to remove characters from the left, we simply select a substring of characters we want to use.
Let’s take a look at the LEFT() function in Excel:
=LEFT(text,[num_chars])We can see that the LEFT() function in Excel has two parameters:
text=represents the original textnum_chars=represents the number of characters we want to use
Say we wanted to remove the last two characters of a string, we could follow the steps below:
- We’ll load our Excel workbook, which contains the original strings in column A
- In cell B2, we’ll use the function
=LEFT(B32, LEN(B3) - 2)
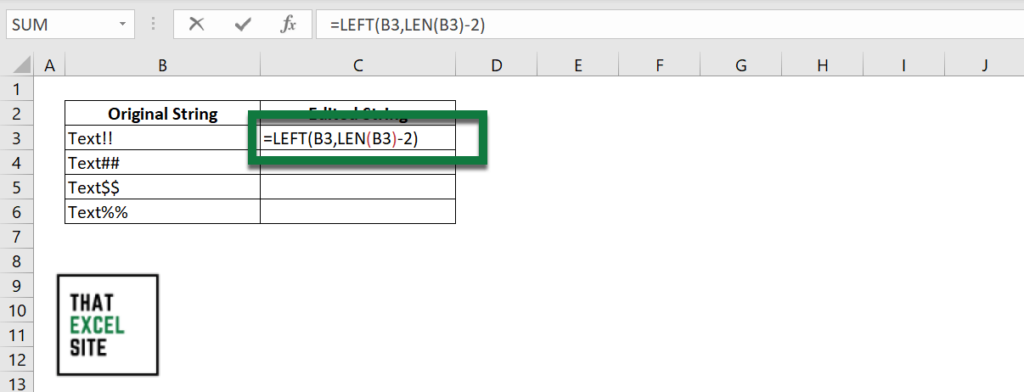
- Once we hit Return, we can see that the last two characters have been removed from the string
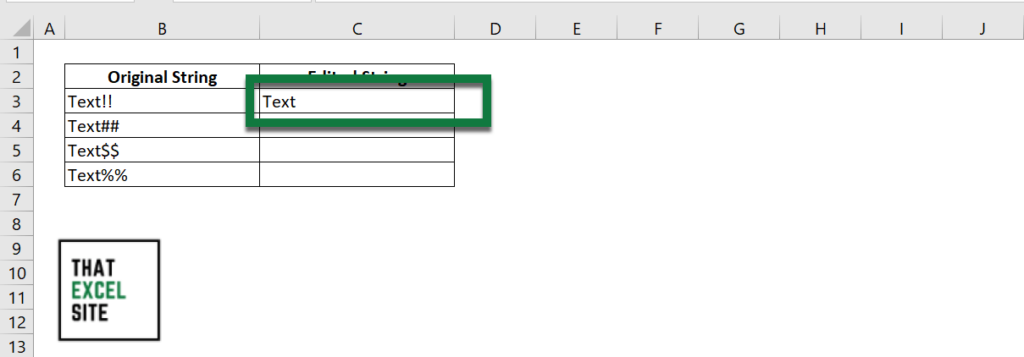
- To complete this for the full column, simply drag the fill handle all the way down
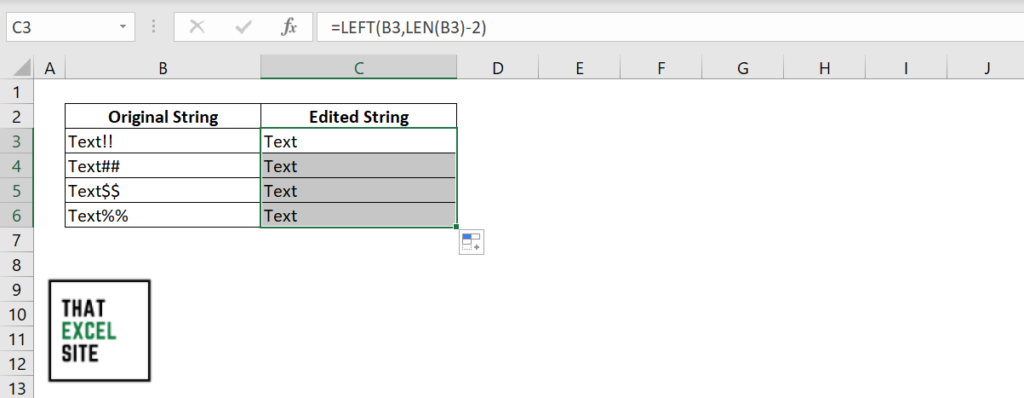
This process works by selecting all but two characters from the left of a string. It’s a fairly intuitive process once you start using it more.
In the following section, you’ll learn how to use Excel’s Flash Fill feature to remove characters from the right or left in Excel.
Using Flash Fill to Remove Characters from Right or Left in Excel
The Excel Flash Fill tool allows you to easily remove characters from an entire column of strings. The Excel Flash Fill tool became available in Excel 2013. So, if you’re working with older versions, then this feature isn’t available to you, unfortunately.
Let’s see how we can use Flash Fill to easily remove characters from either side of a string in Excel:
- We’ll load our Excel workbook, which contains the original strings in column A
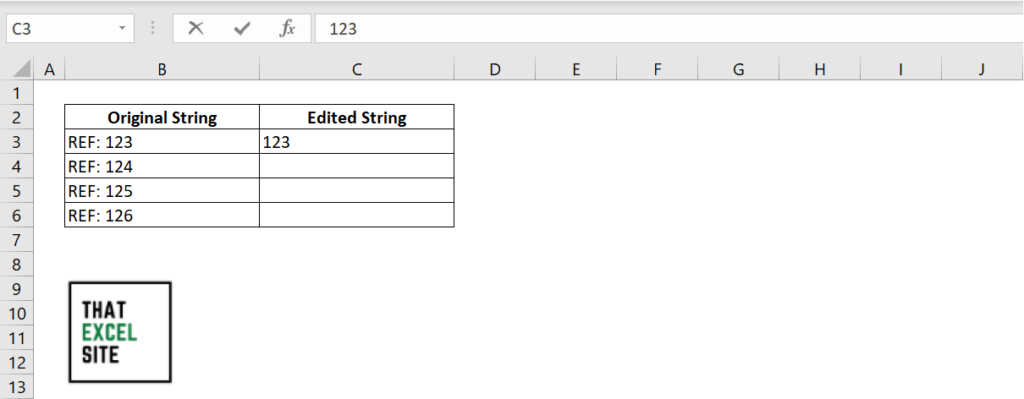
- In cell A2, type the result that you want. For example, here we want to remove the first five characters
'REF: 'and keep only the reference number. - Move onto cell A3 and start typing the expected value. Excel will begin to detect the pattern that you’re hoping to extract and intelligently give you a preview of the result.
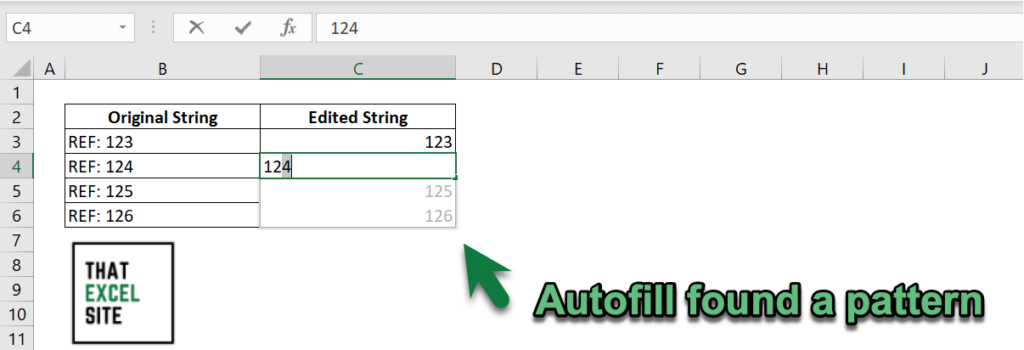
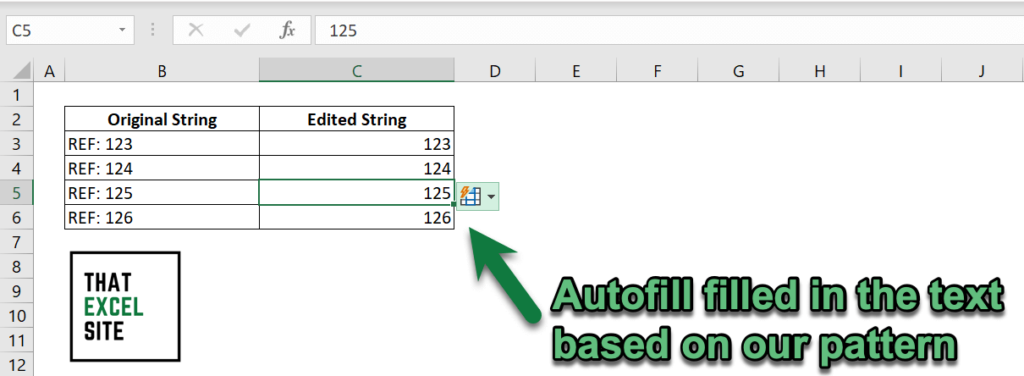
- If you’re happy with the preview, simply hit Return to accept the preview and fill in the entire column.
In the final section below, you’ll learn how to use text to columns in Excel to remove characters from the left side of a string.
Using Text to Columns in Excel to Remove Characters from the Left in Excel
The Text to Columns feature in Excel is an incredible tool that allows you to remove characters based on delimiters or positions. In this example, we’ll focus on how to use the tool to remove characters from the left of a string.
Let’s see how we can use the Text to Columns tool to remove characters from the left in Excel:
- We’ll load our Excel workbook, which contains the original strings in column A
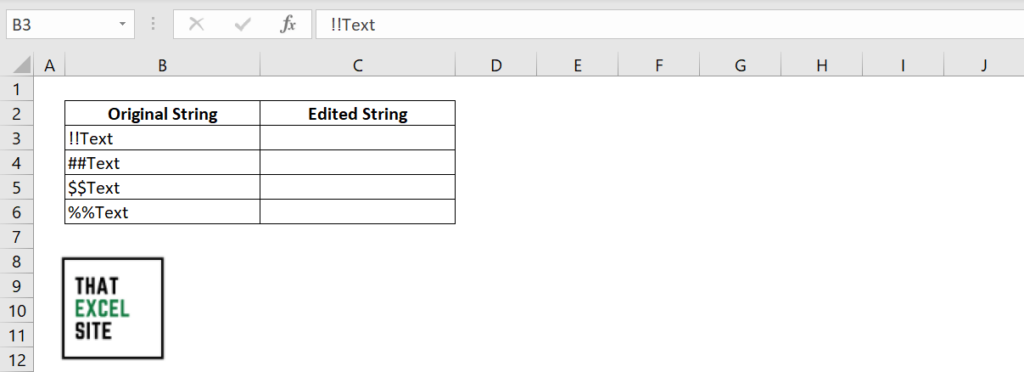
- Select all of the data we want to manipulate
- Go to the Data tab and select Text to Columns
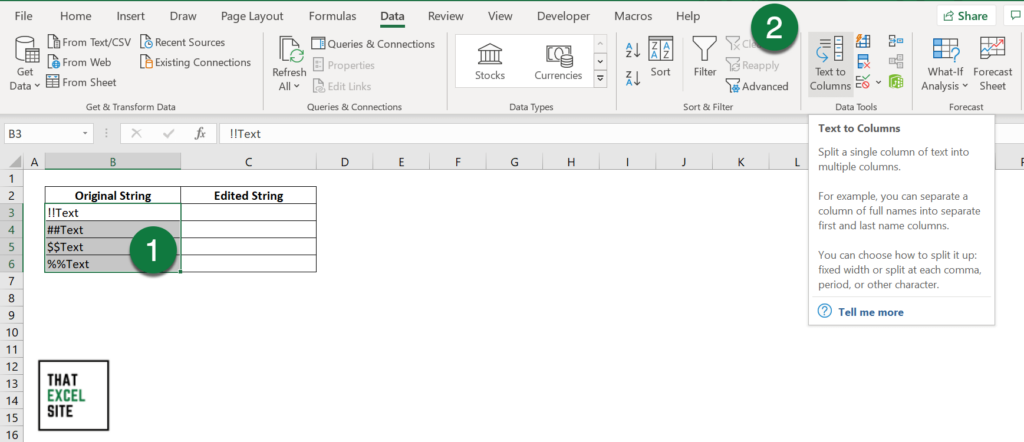
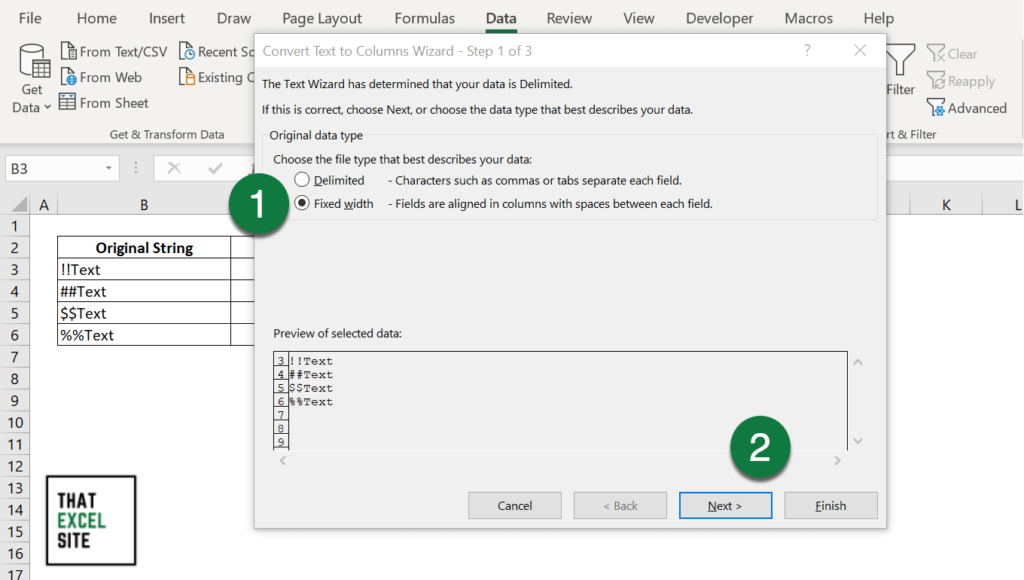
- Select Fixed width and click Next
- Select the position using the user interface to where you want your characters removed
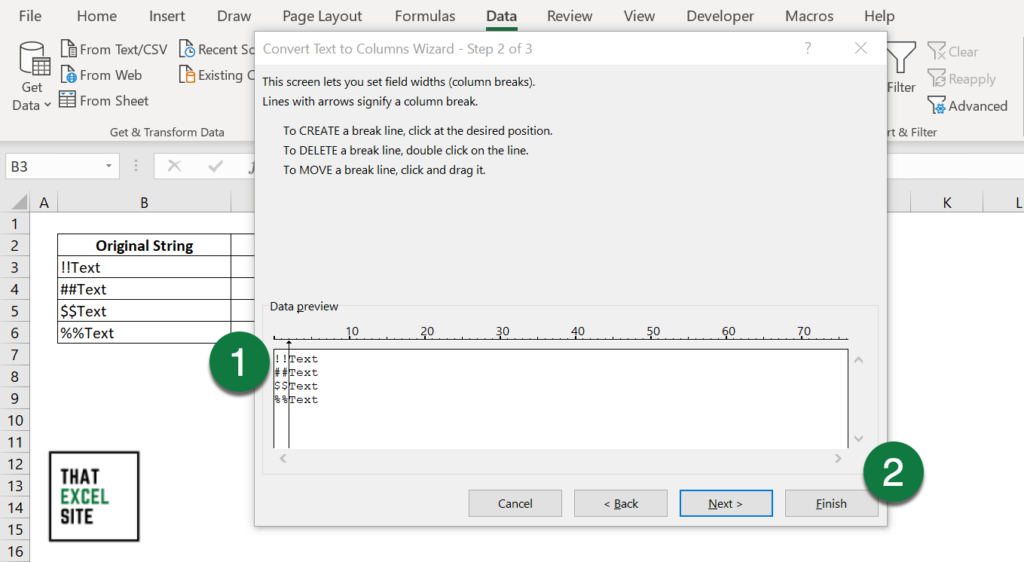
- Click Finish to split the column into two
It’s important here to note that this works best when you don’t have columns on the right of your data. You may need to first insert a blank column between your data, if you have data adjacent to the column, to prevent overwriting it.
Conclusion
In this tutorial, you learned how to use Excel to remove the first or last characters of a string. Working with text data may be essential, but it doesn’t have to be complicated! You first learned how to remove characters from the left of a string. You learned how to do this using the REPLACE() and RIGHT() functions, as well as the Text to Columns feature.
Then, you learned how to remove characters from the right of a string, using the LEFT() function. Finally, you also learned how to use the Flash Fill feature to remove characters from a string matching a pattern or length.
Additional Resources
To learn more about related topics, check out the tutorials below: